Posts

Showing posts from 2014

Create Virtual Host in IIS Server

Image
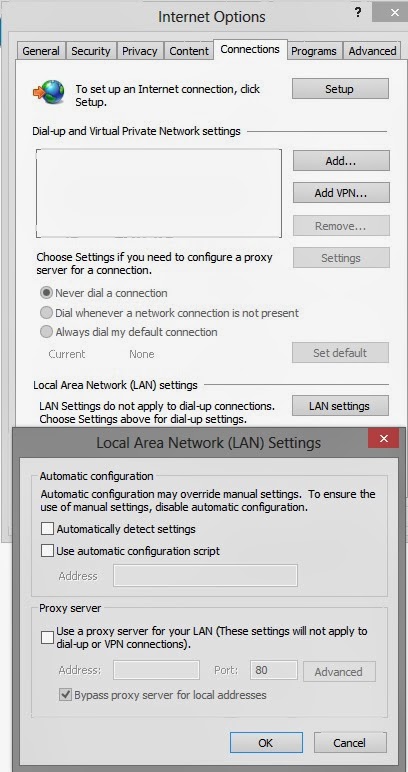
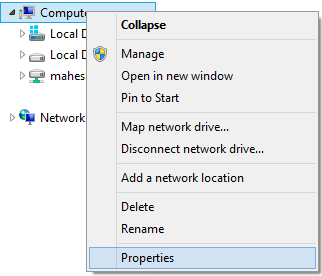
1)  Open Command Prompt using Administrative Rights 2)  Flush the cache of ARP (Address resolution protocol) a) C:\Windows\system32> netsh interface ip delete arpcache b) C:\Windows\system32> arp -a 3)  Open IE (Internet Explorer) a)  Open Internet Options window from settings b)  Click on Connections Tab -> Click on LAN Settings button c)  Uncheck all checkbox but make sure to check the "Bypass proxy server for local address." 4)  Open Hosts file from C:\Windows\System32\drivers\etc Folder (Make sure is it have write permission) It will look like this # localhost name resolution is handled within DNS itself. # 127.0.0.1       localhost # ::1                 localhost Add these lines at bottom of this file (You can add multiple names) 127.0.0.1 mysite.com 127.0.0.1 maheshbokkisam.com 5)  Now check is these virtual host/domain names are working a)  Go to Command Prompt and run this commands 5.a.1)  ping mysite.c

Find the php.ini or php installed path in windows from command line prompt

How to find .ini file OR php path OR php version OR any other details of PHP. If you installed   PHP   in windows directly or using webplotform installer. Open command prompt and go to C Drive type C:\> php -v The result will be like this in my system, it may differ to you based on PHP version PHP 5.4.24 (cli) (built: Jan  8 2014 20:26:10) Copyright (c) 1997-2013 The PHP Group Zend Engine v2.4.0, Copyright (c) 1998-2013 Zend Technologies C:\>php --ini Configuration File (php.ini) Path: C:\Windows Loaded Configuration File:         C:\Program Files (x86)\iis express\PHP\v5.4\php.ini Scan for additional .ini files in: (none) Additional .ini files parsed:      (none) If you want search/find using particular key word you can use this command C:\>php -i | findstr php.ini Configuration File (php.ini) Path => C:\Windows Loaded Configuration File => C:\Program Files (x86)\iis express\PHP\v5.4\php.ini C:\>php -i | findstr version System => Win

AIOMgr: Preparing flush failed with VERR_NOT_SUPPORTED, disabling async flushes

AIOMgr: Preparing flush failed with VERR_NOT_SUPPORTED, disabling async flushes If you get error like this while Installing Windows 8.1 as guest OS using Oracle VirtualBox /VirtualMachine Then check your RAM Allocation for the Guest OS. Example: First time i gave 5120 (5 GB) of RAM for Guest OS. while installing i got the error like this in log file AIOMgr: Preparing flush failed with VERR_NOT_SUPPORTED , disabling async flushes. Now i changed the RAM size to 4096(4 GB) , now the error gone, the guest OS installed successfully. My Suggestion is to set RAM size in EVEN  for this kind of errors.

AJAX log of Downloading Windows 8.1 os using Akamai netsession interface control panel

For every one sec (Akamai netsession interface control panel) Request URL:http://127.0.0.1:9421/api?cid=0&function=getFileAttributes&complete&url=http%3A%2F%2Fcare.dlservice.microsoft.com%2Fdl%2Fdownload%2FB%2F9%2F9%2FB999286E-0A47-406D-8B3D-5B5AD7373A4A%2F9600.16384.WINBLUE_RTM.130821-1623_X64FRE_ENTERPRISE_EVAL_EN-US-IRM_CENA_X64FREE_EN-US_DV5.ISO&wrapper=DLMHelper.dispatchResponse(0,%20%27UPDATE%27,*);&r=0.02329613664187491 RESPONSE DLMHelper.dispatchResponse( 0, 'UPDATE', { "http://care.dlservice.microsoft.com/dl/download/B/9/9/B999286E-0A47-406D-8B3D-5B5AD7373A4A/9600.16384.WINBLUE_RTM.130821-1623_X64FRE_ENTERPRISE_EVAL_EN-US-IRM_CENA_X64FREE_EN-US_DV5.ISO": { "status":"DOWNLOADING", "dontshare":false, "peerratio":0, "maxdownloadrate":0, "suberror":0, "peerrecv":0, "path":"D:/Softwares/microsoft/9600.16384.WINBLUE_RTM.13082

Setup environment for PhoneGap android with eclipse in Windows 7/8

Image
1) Download  a) JAVA from http://www.oracle.com/technetwork/java/javase/downloads/index.html b) APACHE ANT from   http://ant.apache.org/bindownload.cgi (under Current Release of Ant) c) ANDROID SDK from https://developer.android.com/sdk/index.html#ExistingIDE * This will contain  * Eclipse + ADT Plugin * Android SDK Tools * Android Platform-tools * The latest Android platform * The latest Android system image for the emulator d) If you want new version of Eclipse you can download from https://www.eclipse.org/downloads/ 2) Install all Software. 3) Now we will Set up environment variables * Follow the bellow images                       Under User variables for {YOUR NAME} JAVA_HOME     C:\Program Files\Java\jdk1.7.0_51\     Under System variables ANDROID_HOME  E:\Downloads\adt-bundle-windows-x86_64-20131030\sdk          (This is my source path) ANT_HOME      C:\apache-ant-1.9.3  (This is my source path) PATH      

The model type is invalid. please select an item from the list ( ASP.Net MVC)

Image
Hi, If any one face this problem, hear is one solution While creating/Add controller for Entity Framework in Asp.Net MVC3 OR MVC4 Example: As per this website Controller name:  MoviesController . (This is the default. ) Template:  Controller with read/write actions and views, using Entity Framework . Model class:  Movie (MvcMovie.Models) . Data context class:  MovieDBContext (MvcMovie.Models) . Views:  Razor (CSHTML) . (The default.) when we click on " Add" Button the application show one alert message "The model type is invalid. please select an item from the list " Before adding MoviesController we need to  built the project before proceed to this step. Click on Run Button to built the project and now add controller with above steps. I hope you problem will be solved.

How to install Node.js, npm, socket.io and use them?

1 Go to  http://nodejs.org  and click on Install button,  2.. Download node and install it 3.. Create an empty folder on your hard disk      3.1) check environment path of nodejs using command prompt             a) C:\>set %PATH%              If it is not showing any path regarding node then set the environment path             b)  C:\>set path=%PATH%;C:\Program Files\nodejs\ 4.. Create an package.json file with the following content       Ex: C:\Program Files\nodejs\package.json { "name" : "App" , "version" : "0.0.1" , "description" : "App" , "dependencies" : { "socket.io" : "latest" }, "author" : "developer" } 5.. Open windows's command prompt (press Windows key + R and type  cmd ) 6.. Navigate to your newly created directory with  cd  command 7.. Type  npm install  in that directory       7.1)

How to pass Magento Certification Exam in 30 days

This is from   "SMASHWORDS.COM" https://www.smashwords.com/extreader/read/327369/3/how-to-pass-magento-certification-exam-in-30-days